For Checker Automobiles
~~~~~~~~~~~~~~~~~~~~~~~~~~~~~~~~~~
Lane Darnton
(NOTE: Expand your browser window to full screen, or
at least 800 pixels wide.)
There are several problems that crop up when you try
to install a conventional high performance dual exhaust system on a Checker.
The first is that there are no off-the-shelf 4-tube exhaust headers made
for Checker. The second is that the motor mounts, and the main crossmember
on which they are welded, interfere with all brands of block hugger headers
that I know of, because the drop from the exhaust port centerline to the
collector is too long (usually about 7 inches). The third problem is that
the left side of the car does not offer a lot of room for an exhaust pipe.
Up front on the left you have the steering column, steering box, shift linkage, clutch linkage (on manual transmission cars), and oil filter. In the middle on the left you've got the parking brake cable running right through the frame openings where you'd like to put the left side exhaust pipe. At the rear on the left you have the fuel tank snugged right up against the left frame rail, with the fuel line stretched across the gap between the tank and frame right where you'd like to run your left side tail pipe, and the fuel gauge sender, its 12V wire, and the rear brake flex line, which do not want to get hot. Checker offset the tank so they could put the spare tire upright in a well on the right side of the trunk. Even on wagons, which carry the spare horizontally, the tank location and underbody sheet metal are the same as for the sedan.
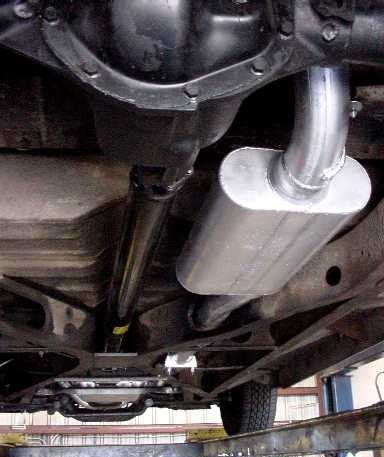
When you think about it, a single exhaust makes sense from a number of standpoints. First, it is cheaper. Second, it is lighter. Third, it has a smoother, more businesslike sound rather than the more raucous, dissonant, and amateurish dual system sound. (Even the folks with dual exhaust install a balance tube back aft to avoid the "cop-caller" racket. A single exhaust is just one long balance tube.) Fourth, the right side of a Checker is wide open all the way back, with nothing in the way.
Hey, NASCAR racers uses single exhaust, why not you?
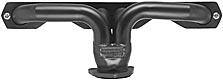
Not long ago, no one made aftermarket 4-into-1 shortie headers that were short enough for a Checker, but that problem vanished when Sanderson Headers brought out their CC-2 model for small block Chevy V8s, pictured here:
Up front on the left you have the steering column, steering box, shift linkage, clutch linkage (on manual transmission cars), and oil filter. In the middle on the left you've got the parking brake cable running right through the frame openings where you'd like to put the left side exhaust pipe. At the rear on the left you have the fuel tank snugged right up against the left frame rail, with the fuel line stretched across the gap between the tank and frame right where you'd like to run your left side tail pipe, and the fuel gauge sender, its 12V wire, and the rear brake flex line, which do not want to get hot. Checker offset the tank so they could put the spare tire upright in a well on the right side of the trunk. Even on wagons, which carry the spare horizontally, the tank location and underbody sheet metal are the same as for the sedan.
When you think about it, a single exhaust makes sense from a number of standpoints. First, it is cheaper. Second, it is lighter. Third, it has a smoother, more businesslike sound rather than the more raucous, dissonant, and amateurish dual system sound. (Even the folks with dual exhaust install a balance tube back aft to avoid the "cop-caller" racket. A single exhaust is just one long balance tube.) Fourth, the right side of a Checker is wide open all the way back, with nothing in the way.
Hey, NASCAR racers uses single exhaust, why not you?
Not long ago, no one made aftermarket 4-into-1 shortie headers that were short enough for a Checker, but that problem vanished when Sanderson Headers brought out their CC-2 model for small block Chevy V8s, pictured here:
The height of this header, from the cylinder head
bolt line down to the collector flange, is only 4.0 inches, where most block
huggers are 7-8" tall. You can see more details at http://www.sandersonheaders.com/pagesbypartnum/cc2.htm.
The collector is 2.5" diameter, appropriate for small block Chevys to 400
cubic inches. This very high quality header costs $225 per pair in plain steel,
$375 bright powder-coated, or $525 in polished stainless steel.
Sanderson recommends copper gaskets, and after a number of paper and fiber
gasket blowouts during 5500 rpm full-throttle acceleration runs, so do I.
The header installation is an absolute no-brainer. The exhaust installation requires a sharp guy with a pipe bender for the crossover pipe and the 2.5"-to-3.0", 2-into-1 "Y" fitting. Don't let some bozo convince you to let him just weld one pipe to the other. The inside of the jont will not be fair, and flow will be impeded. The installation also requires knowledge of a couple of tricks for passing 3" OD pipe through 3" ID holes in the frame X-braces.
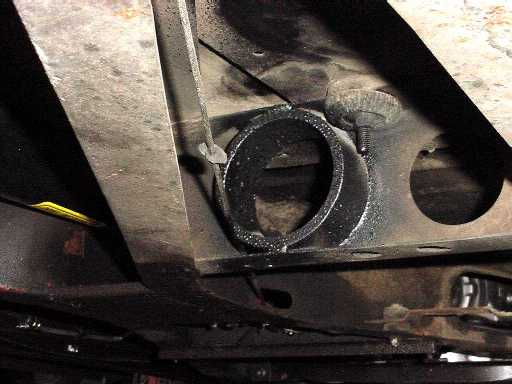
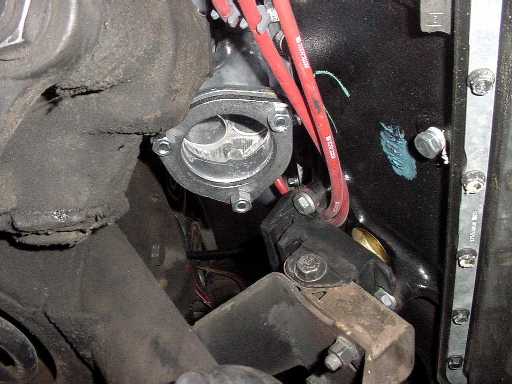
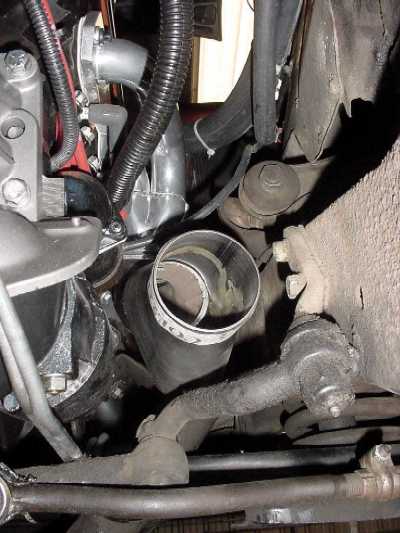
The job starts with the crossover pipe, starting from the left. Here is the left side header flange from below, awaiting pipe:
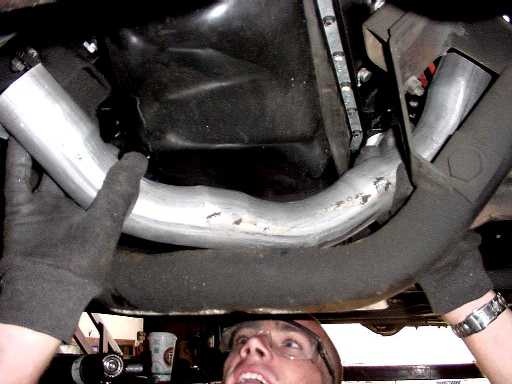
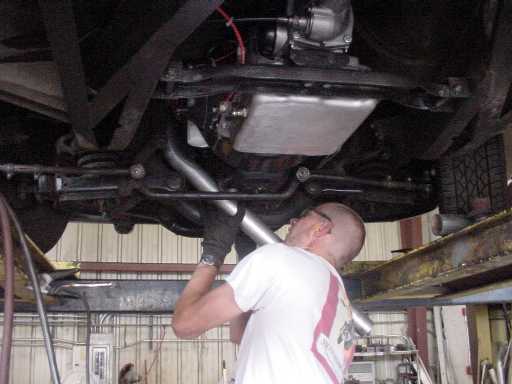
Here's the installer starting to fit the crossover pipe to the left side header flange:
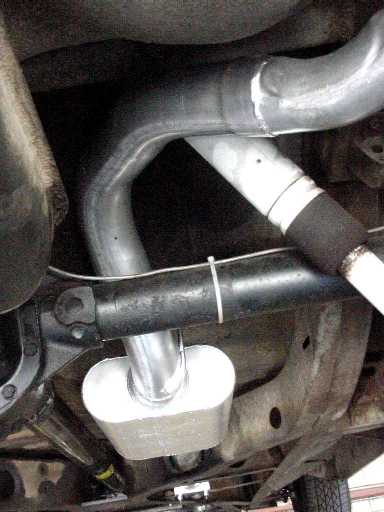
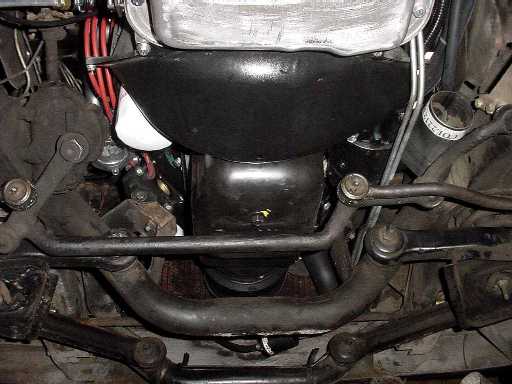
A few bends later (view from the front), he's getting the crossover close to the Y-pipe (left, out of view):
The header installation is an absolute no-brainer. The exhaust installation requires a sharp guy with a pipe bender for the crossover pipe and the 2.5"-to-3.0", 2-into-1 "Y" fitting. Don't let some bozo convince you to let him just weld one pipe to the other. The inside of the jont will not be fair, and flow will be impeded. The installation also requires knowledge of a couple of tricks for passing 3" OD pipe through 3" ID holes in the frame X-braces.
The job starts with the crossover pipe, starting from the left. Here is the left side header flange from below, awaiting pipe:
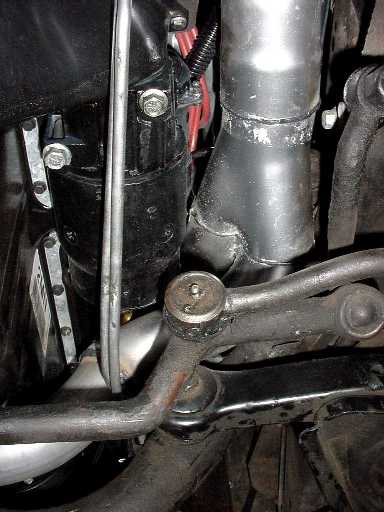
The crossover pipe will go from the left header flange
(left) to the "Y" pipe (right):
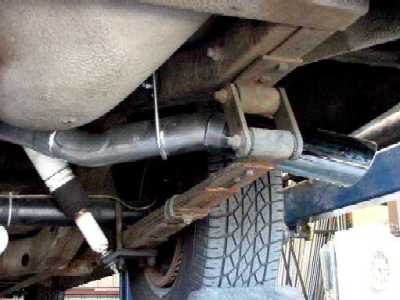
Here's the Y-pipe placed on the right-side collector pipe, and a close-up of the Y-pipe from the rear, awaiting the crossover pipe, which will come from "behind" in this photo. You're looking at the 3" outlet. The right-side collector pipe can be seen inside the Y:
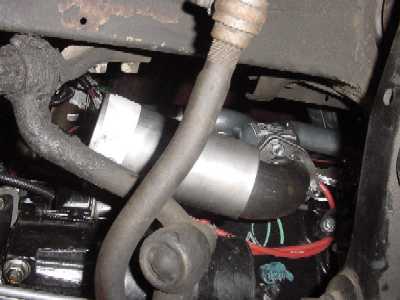
Here's the Y-pipe placed on the right-side collector pipe, and a close-up of the Y-pipe from the rear, awaiting the crossover pipe, which will come from "behind" in this photo. You're looking at the 3" outlet. The right-side collector pipe can be seen inside the Y:
Here's the installer starting to fit the crossover pipe to the left side header flange:
A few bends later (view from the front), he's getting the crossover close to the Y-pipe (left, out of view):